Showing posts with label quilts. Show all posts

Tuesday, January 16, 2024

More Community Quilts - this one from Bonnie Hunter

 An oldie but a goodie - first published in 1999 as a Community Quilt pattern. Find it on Bonnie Hunter's blog/freebie tutorial site:  Quiltville's Quips & Snips!!: Free Patterns!

Quiltville's Quips & Snips!!: Free Patterns!

SCRAPPY TRIPS in Bonnie's tutorial are 6 strips turning out a 12" finished square.

I’ve made this pattern in 6 step trips and it turned out well – the picture is on the guild’s Facebook page!

However, I had a hard time keeping the sequence of the strips in order so that I ended up unsewing and resewing far more than the pattern called for.  Therefore I am offering the following advice.  This won't make much sense if you have not read through Bonnie's free pattern linked above but if you are thinking of making this quilt with your leftover 2 1/2" strips it might prove helpful.

Today I am trying it in a 5 step version.  I have learned a few things about making this quilt that might be worth sharing.  I have found that keeping the strips in order so that removing the correct seams in the right sequence is more challenging than I thought it would be.

I have found a method this time around that is working really well, so I’m going to share it here (and with a link FaceBook as well as our website) to help others avoid the confusion and resewing that I did on my first effort.

1st -   Alternating lights and darks works best – it doesn’t matter what color comes out on the full diagonal. Variety is good!

2nd – I use a slotted ruler to cut the strip sets – saves so much time! I place colored stickers on the correct slots – so easy!

3rd – once the sets are on the cutting mat, don’t disturb the sequence!
Place a pin within the seam allowance at the top of the first strip.
take the next strip and move the top seam allowance down one fabric and place a pin in that seam allowance. Continue along the strips inserting pins in all of the seam allowances that will be removed.

4th – stack the strips IN ORDER and clip them all together in the middle of the stack so that the intended seam allowances are all in a line.

Now it is safe to remove the stitches in the designated seams.
Just unfold them - lay the strips on your design board and sew your block!


Strip sets bundled by block with stitching in top blocks removed - total of three blocks.

I use a plastic scrap box to keep my blocks flat until I have enough for a quilt top.


The strips are cut at 2 1/2" so the blocks finish at 10" square.

The version with 6 strips finishes at 12" square, but that size is too big for this box!

That's all for today.

Thea 


Wednesday, March 30, 2022

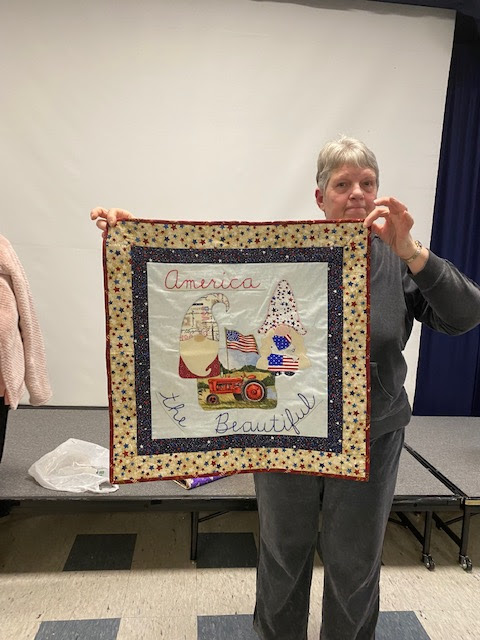
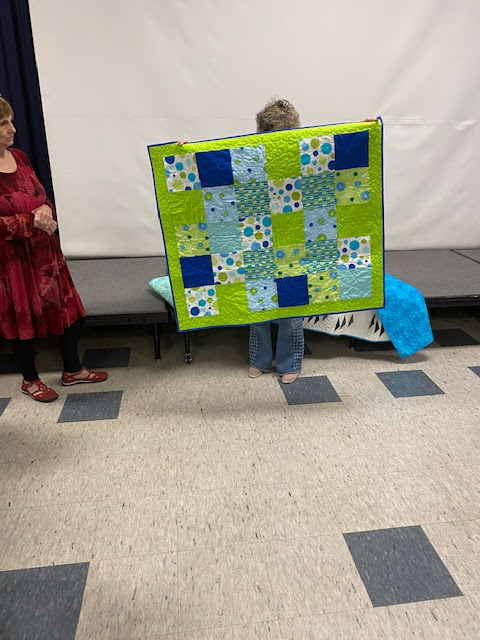
Quilt Show & Tell Pictures

Show & Tell on Monday March 21, 2022

(sorry, no data available)

If any of these are yours and you would like info on your quilt included - please email info to me at grannygoodstuff@ymail.com


Tuesday, February 22, 2022

TUTORIAL from Quilt Company East Quilt Guild Sew Day - 2-19-2022

With so many guild participants and friends from far and near joining in on ZOOM, it seems appropriate to share some of the goings on with those unable to attend. The block of the day was very well received so let's put it here for future reference!

This block tutorial was presented as a Power Point slide show at the QCE Sew Day on Saturday February 19, 2022.

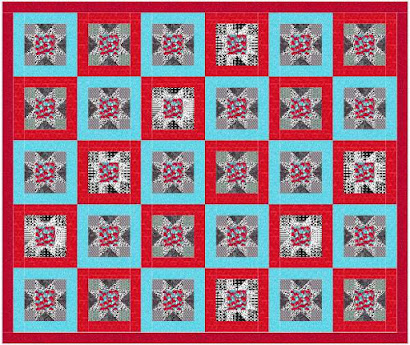
All guild members are encouraged to make a block for Community Quilts. Choose a variety of Black on White and White on Black prints for contrast. Note how blocks can be a Star, a Cross, or a big X.
You decide!


See the examples towards the end for ideas.


Notice how this block looks like an X?


Bright colors go so well with the black & white prints!  

Add the coordinating borders.

Here are Sally's blocks:


Thirty blocks make a twin size quilt approximately 77"x92"!

Please leave comments below 
- we love feedback. :-)


Friday, August 21, 2020

QCE Update 8/21/20


Facebook, Blog, Zoom, etc.

Hello Quilters! I’ve missed you all so much. It seems like forever since we’ve been together at Churchill for a regular, in person meeting.  It also looks like it will be a while longer until we can be physically together. To help us all keep in touch while we wait, we are and will continue to take advantage of whatever we can on the Internet. To aid in that social distancing requirement, most meetings will be held online. For your viewing pleasure, all guild members are invited to join our Guild Facebook page (if you have not already) at https://www.facebook.com/groups/122668044442741

Facebook also allows us to have albums where we can post pictures of our latest quilts and other projects. I have created albums where any member can upload, and albums for our 'special interest' groups such as Creative Quilters and the recent results of the Progressive Quilters as well as past meetings and monthly Show N Tell.   https://www.facebook.com/groups/122668044442741/media/albums

Also available on FB are files of various forms and documents such as the membership application form: https://www.facebook.com/groups/122668044442741/files

If you are not already a FB member, please send a request through the FB site so I can “admit” you to our private QCE page. There are several albums on our FB site where you can add photos of your latest quilts – you might want to use a ‘stamp’ or ‘label’ on your photo if you prefer not to post anything other than your photo.  For those who are concerned, you can view once you are admitted, but there is no obligation to post comments or photos. Also, if you don’t want to use your ‘work name’ you can let me know via text or email of your “QCE ID” which can be a slightly miss-spelled version of your name, or a totally fictitious name of your choosing, such as the “kwlt kween” id that my sons gave me many years ago.

Thanks for being a guild member, and please renew so you can take advantage of all the innovations that will be happening as we move into our electronic future, however long this situation lasts.

Here is one of my quilts waiting on the "to be quilted" line:

SHOW N TELL

Please let me hear from you by leaving a comment below.